When I was asked by a fellow blogger/Instagram friend to participate in a Blogger’s Clearance Challenge, I was beyond excited! The rules were simple- spend less than $15 at any retail store’s clearance section, and create something beautiful from your purchase. As an avid clearance section shopper, this challenge felt like it was made for me!
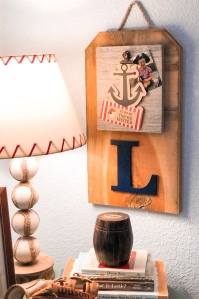
After some deliberation, I chose T.J. Maxx. Excitedly, I cruised through the door, and beelined for the red tagged aisle that I 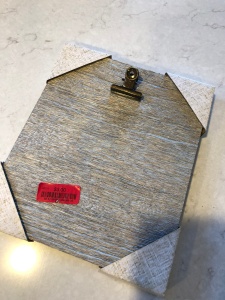 know so well. I skimmed over chipped mugs, stone statues and figurines with crumbling features, a few candles in broken jars, and some unraveling baskets. And then I found this gem, marked at $3. I can’t tell you exactly why it was marked down so low. I assume it had a backing of some sort, or an accompanying piece of art once held by the clip that had long since disappeared. Its simplicity is what attracted me, and the $3 price tag caught me hook, line, and sinker.
I took my little treasure home, thinking over all the different possibilities and ways to showcase my find.
I walked into my garage and perused, for the second time that day, shelves filled with less-than-shiny, far-from-perfect items. These shelves, however, contain my paints, sandpaper, stencils and brushes. My loved and well-worn crafting gloves and hot glue gun. It’s from here that so much of my inspiration is found. From my shelves, I plucked some Dollar Store rope, a can of blue spray paint, some wood glue, my staple gun, and a wooden letter “L” leftover from a project completed ages ago. I then ransacked my husband’s scrap wood pile and found a piece of old fence board that was serving no purpose but to host a rather large spider who scared the dickens out of me when I picked up the board. We made it up in the end, and agreed to a mutual respect for one another.
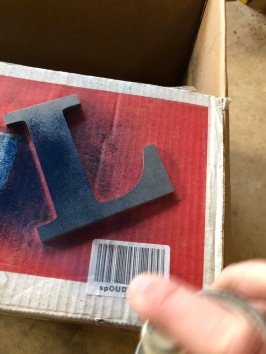 Before gathering up the supplies, I stopped at an empty box in the garage, placed the “L” on top, and quickly spray painted it with the blue spray paint. Setting it aside to dry, I took my haul inside the house, and got to work.
I trimmed the rope down to about an 8″ piece, and stapled it to the back of the fence board, creating a cute and practical way of hanging the piece. I use this trick often, mainly because I jus t have zero patience for picture hanging hardware. Have you ever worked with that stuff? It’s a major pain! No, thanks! I’ll take my ru
 stic rope and staple gun, thank you very much.
Next, I’d like to tell you that I opened the bottle of wood glue with ease and grace, then ran a clean, neat line along the backing of my frame. But that would be a lie. In reality, I couldn’t open the stupid bottle, and in my impatience, sawed the thing in half with a bread knife, then dipped my finger in the bottom half and used that method to spread the glue. Hey, it worked.
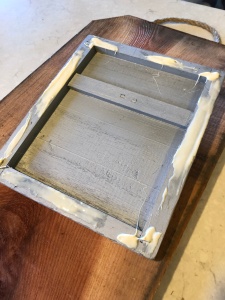
As soon as the paint on my “L” was dry, I retrieved it from the garage and repeated my elegant glue spreading method on that as w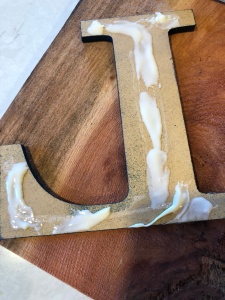 ell, then pressed it down firmly onto the board as I’d done with the clip frame.
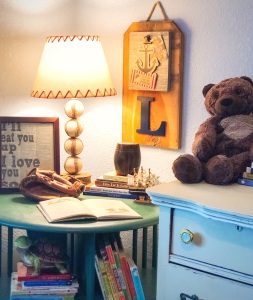
I left my creation on the kitchen counter to dry, and placed in the clip a picture of my son, Leston, as well as a leftover invitation from his last Birthday party.
 Once dry, I hung it in Leston’s room, amongst his other treasures.
I absolutely love this piece. I love that he’ll be able to customize it any way he likes, showcasing photos of his friends, or, one day (gulp!) girlfriends! He can use it to hold important items like invitations, letters, notes, concert tickets, or any other small item of importance.
Not bad for $3, I’d say. Bring on the next challenge!
Check out the beautiful things my friends did for this fun challenge!


You really knocked this one out of the ball park! 😀 Love it! Your style of writing also kept me entertained and based on some of your descriptions (I won’t say which) I think we may be “kindred spirits” – to quote Anne Shirley. Love it!
LikeLike
Lindsay, Isn’t it amazing what we can do with a little imagination. I love how you made the little clip board come to life. I am in love with this wall decor for your son’s room.
Funny you had a mishap with the wood glue….I also was working with my bottle of glue. Mine was a huge mess. Let’s just say I threw it away and went and bought me more. Hopefully this time the darn thing won’t do that!
Love working on the challenge with you. Hope you have a great week!
LikeLike
I love what you have created! It looks perfect in your little guy’s room! As a mom of four boys, I absolutely love cute boy spaces!! Your son’s room is darling!!
~ Emily
LikeLike
What? How clever!!!! That came out so cute.
LikeLike
This is the cutest idea! Love what you did with your bargain – so creative!
LikeLike
Lindsay, I absolutely love the sign that you made! Such a cute find/makeover for a little boy’s room!
LikeLike